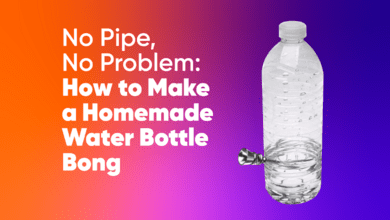
No Pipe, No Problem: How to Make a Homemade Water Bottle Bong
Published on 7/3/22
The legal weed community has come a long way over the past two decades. These days, you can walk into a dispensary and purchase cannabis products that people 20 years ago would never have imagined, ranging from tasty edibles to refined, crafted cannabis concentrates, tinctures, and vapes. For some cannabis users with well-developed legal markets like California, Colorado, Washington, and Oregon, buying dried, smokable cannabis flower is a thing of the past, opting for potent concentrates and easy-to-use vapes instead. Sometimes, however, there's nothing like smoking some good old cannabis flower in the form of a joint, blunt, or even a homemade bong.
After all, sometimes there's nothing quite like kicking it old school and smoking out of a water bottle bong with your buddies. These homemade water bongs are typically made of Gatorade or water bottles you might have lying around, the pinnacle of stoner engineering at its finest. We here at Where's Weed are always down with the OG roots of stoner engineering, so we wanted to highlight that here.
So with that in mind, this article will explain exactly how to make a homemade bong, what stuff you'll need to put one together, and how to use one! So, without further delay, let's make your homemade bong idea a reality!
A Temporary Solution
Before we get too deep into exactly how and what to make a water bottle bong out of, let's first get one thing out of the way; A water bottle bong is not a permanent solution for a few reasons.
First, even the best-made water bottle bong is a little bit rickety. It's crafted from a collection of plastic stuff that was never meant to be used this way. So while it's great for a smoke session or two, if you're in a pinch, it's not the way to go if you're looking for a reliable, long-term bong option. For that, you should invest in a quality glass bong that will stand the test of time and not slowly poison you by repeatedly breathing in plastic fumes.
With that in mind, however, sometimes you don't have access to a glass bong, so here's how to make a homemade bottle bong of your own in the meantime!
What You'll Need to Make a Homemade Bottle Bong

To put together a homemade water bottle bong of your own, you'll need a few essential components that, even if you're not a cannabis aficionado or seasoned stoner, you'll likely have lying around the house anyway.
Here's a list of stuff you will need:
- A relatively thick plastic bottle, like from a Gatorade or soda
- Scissors, a sharp knife, or something to cut the bottle with
- A pen, marker, or highlighter that you're fine breaking apart
- Some aluminum foil, the thicker, the better
- A toothpick or needle
- A lighter
- A strain for your favorite cannabis flower
How to Make the Best Hitting Homemade Bongs
Now that you've gotten all the essential components together, the next step is piecing them together into something functional. Thankfully, we've got your back here at Where's Weed and have a step-by-step guide for how to assemble a top-notch homemade bong. Follow these steps, and you'll enjoy a top-notch smoke session in no time!
Step 1: Get Your Bottle Ready
The first step to making a top-notch homemade bottle bong is picking the right bottle. You'll want to go for a bottle with somewhat thick plastic, like a Gatorade bottle, a sports drink, or a soda container, rather than one with thinner plastic-like bottled water. While you can use the thinner water bottles, they're more likely to crumple up and end up breaking or wearing out sooner than a thinker bottle.
Once you have the right bottle selected, the next step is to wash it out. While it might sound appealing on the surface, the reality of smoking out of a water bottle bong with sticky soda or sports drink residue isn't nearly as tasty as it sounds.
Step 2: Get Your Stem and Bowl Ready
Now that you've chosen your bottle, washed it out, and set it aside for later, it's time to make your downstem and bowl. You'll need to take apart that pen, highlighter, or another tube-shaped thing, removing the insides to leave a hollowed-out tube. Now, it's time to attach your bowl to it.
To craft your bowl, you'll need your aluminum foil. First, take a medium to large metal sheet off the roll and fold it several times to get it as thick as possible. Then, you'll place the foil on one end of the tube you just created, folding it down, so it indents into the tube's hole without tearing. From there, use a toothpick or needle to poke a few tiny holes in that foil. And boom, just like that, you've made a combination of a homemade bong filter and bowl!
Once that stem is made, suck on the other end to see if there's airflow. There should be some, but not too much. You want enough holes for the smoke to come through without being able to suck the scoobies through the piece!
Step 3: Cut Your Downstem and Carb Holes
Now that you've made all the materials that will go into the bong itself, it's time for the amateur surgery on the bottle! This part is perhaps the most problematic and trips up the most people, but no worries, it's not that hard as long as you're careful and take your time.
Take scissors, a razor blade, or a knife and cut a hole in the side of the bottle towards the bottom for the downstem. The hole should be as precise as possible, fitting closely to the side of the downstem to ensure no fumes escape. If you're looking for the tightest possible seal and want more than one use out of this homemade water bong, use your lighter to melt a soft spot in the side. Just make sure not to breathe in those fumes, they're really bad for you. Once the plastic starts to warp and melt, punch the downstem through the melty part and leave it to harden. Once it cools down again, that will create a tight seal around your downstem.
Next, you'll want to cut a carb hole towards the middle of the opposite side of the bottle than the downstem. You should cut this hole instead of melting it, but make sure it isn't too large.
And just like that, the most challenging parts of the job are now done!
Step 4: Add Water
Like any other water pipe, you'll need to add liquid to your homemade water bottle bong to work properly. You'll need just enough water to ensure the bottom of your downstem is fully submerged. You're good to go as long as the downsteam can stay underwater while you're hitting and using this water bottle bong!
Step 5: Pack a Bowl and Spark Up
Now that you've gone through the effort of making your homemade bong idea a reality, it's time to enjoy the fruits of your labor! From here, you'll treat your homemade bottle bong like any other bong you've used, packing your ground cannabis flower into the stem, lighting it, and smoking that cannabis! Now that your masterpiece is crafted feel free to pass it around and make sure everyone gets a good look at it and a good rip from it!

